Integrate D365 F&O Data into Dataverse Using the Data Integrator
Note (2025): This post was written in 2020 and uses the terminology of that time. Since then, Common Data Service (CDS) has been renamed to Dataverse, and the short-lived "Microsoft DataFlex Pro" branding was dropped. The Data Integrator shown here is still functional, but for new implementations Microsoft now recommends Dual-write for real-time bidirectional synchronisation between F&O and Dataverse, or Virtual Tables for direct read access to F&O data from Dataverse without copying data. The walkthrough below remains useful for understanding the underlying concepts.
Microsoft DataFlex was built on top of the Common Data Service (CDS), and at the time of writing Microsoft had recently renamed CDS to Microsoft DataFlex Pro. However, most of the technical tools and apps still used CDS terminology, so this post uses the same terms to avoid confusion.
CDS consists of a number of standard entities that connect to Microsoft Dynamics 365 apps and support typical business scenarios. Dynamics 365 apps such as Sales, Service, and Marketing use CDS to store data natively, which allows you to build Power Apps directly against your core business data without the need for manual integration. However, Dynamics 365 Finance, Dynamics 365 Supply Chain Management, and Dynamics 365 Commerce still require configuration of the Data Integrator to make business data available within CDS. In this post, I show how it can be done.
Setting Up the Connection
To start, let's create a connection. Go to Power Apps > Connections > New connection and search for Dynamics.

Click the "+" button and select Create, then provide your sign-in credentials for the targeted D365 F&O environment.
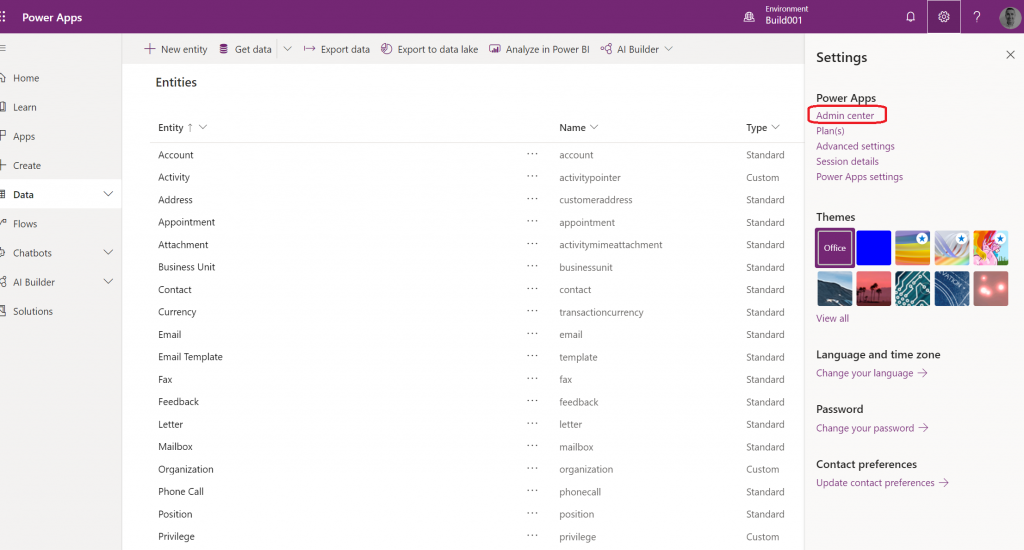
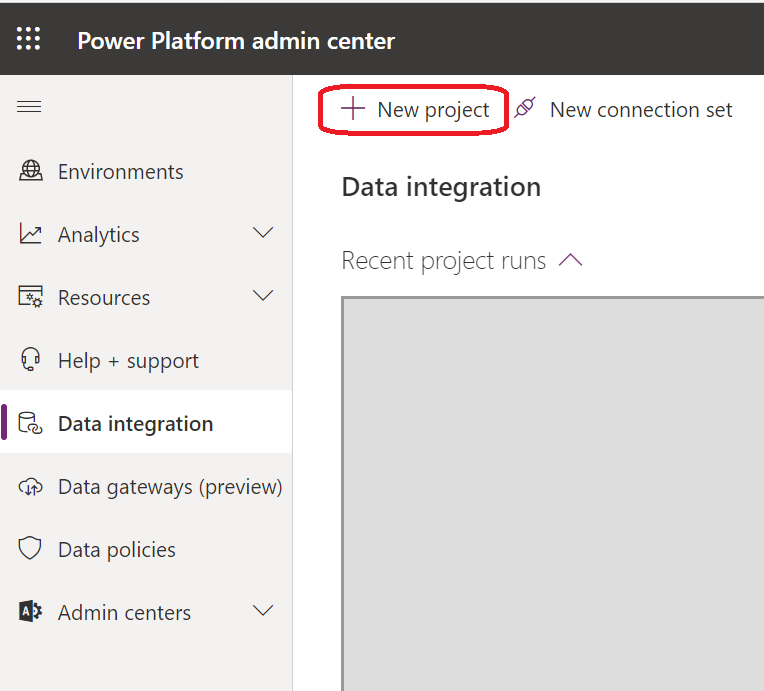
Now that we have our connection, let's go to the Power Platform admin center to start building our first connection project. Click Settings > Power Apps > Admin center.
From there, go to Data integration and create a new project. Make sure an environment has been created first if you are using Power Apps for the first time — this can be done in the Environments section of the Power Platform admin center.
Creating a Connection Project
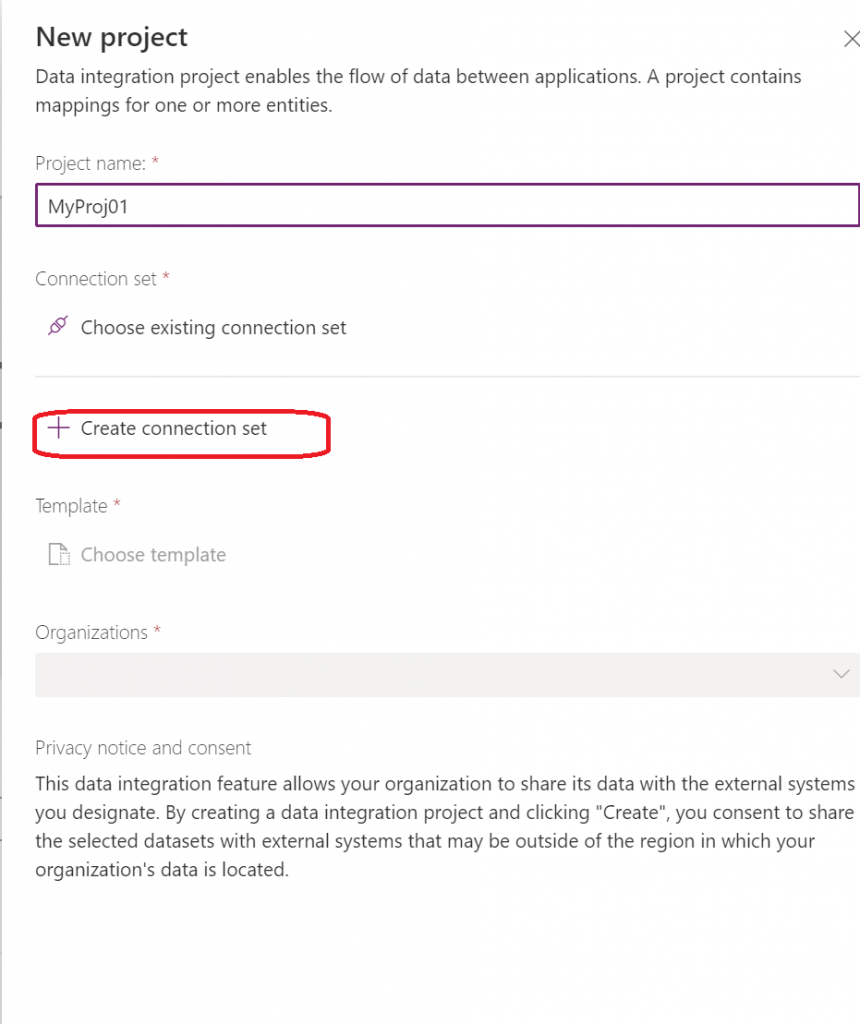
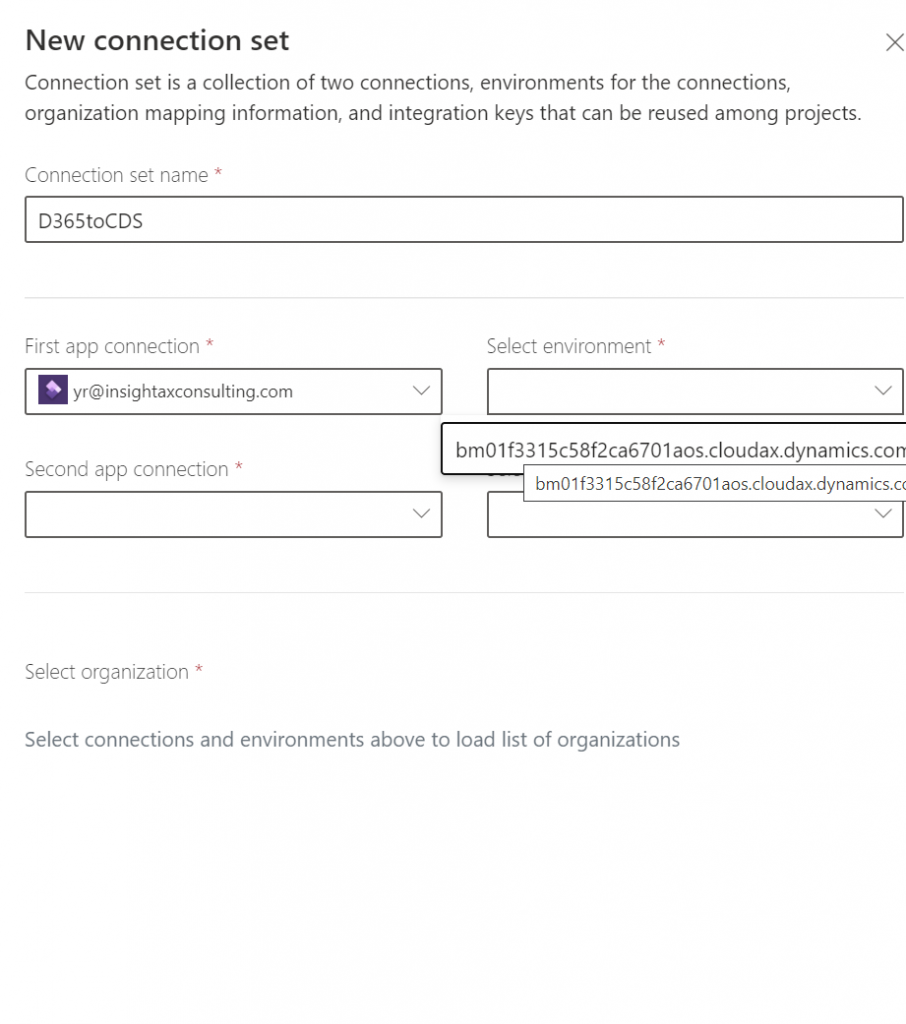
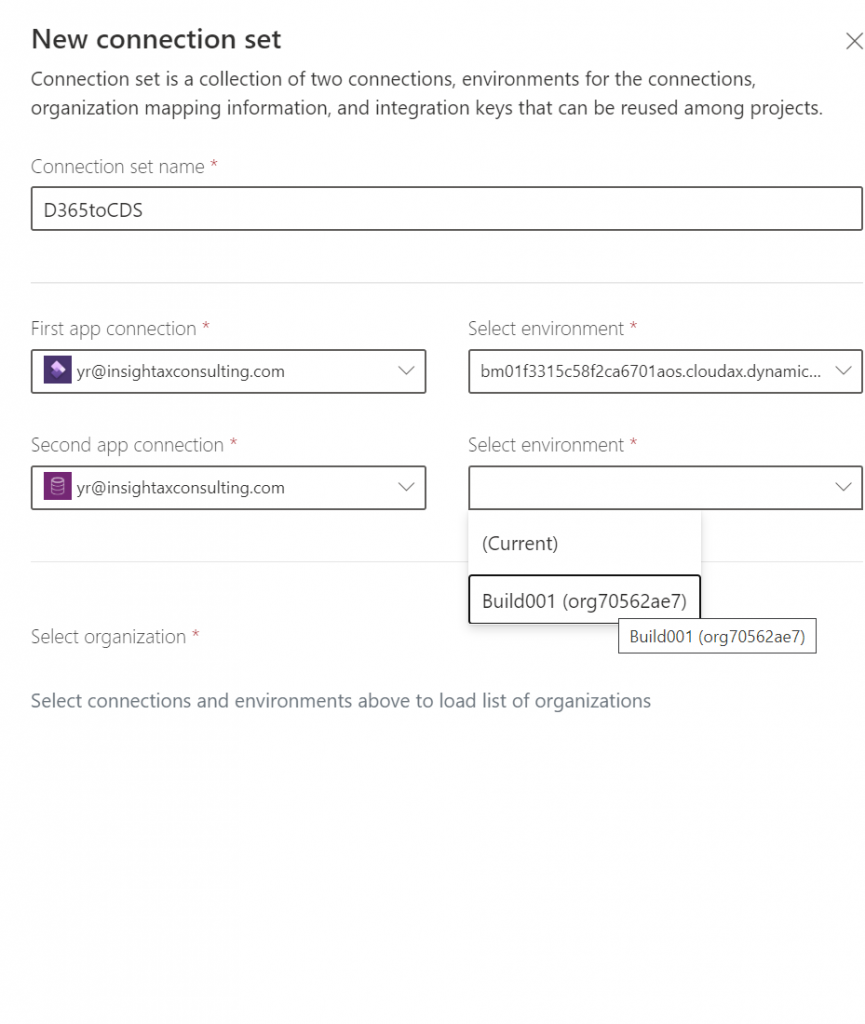
In the "New project" dialog, type a project name and select Create connection set.
In the new connection set, specify a name and select the two apps to connect.
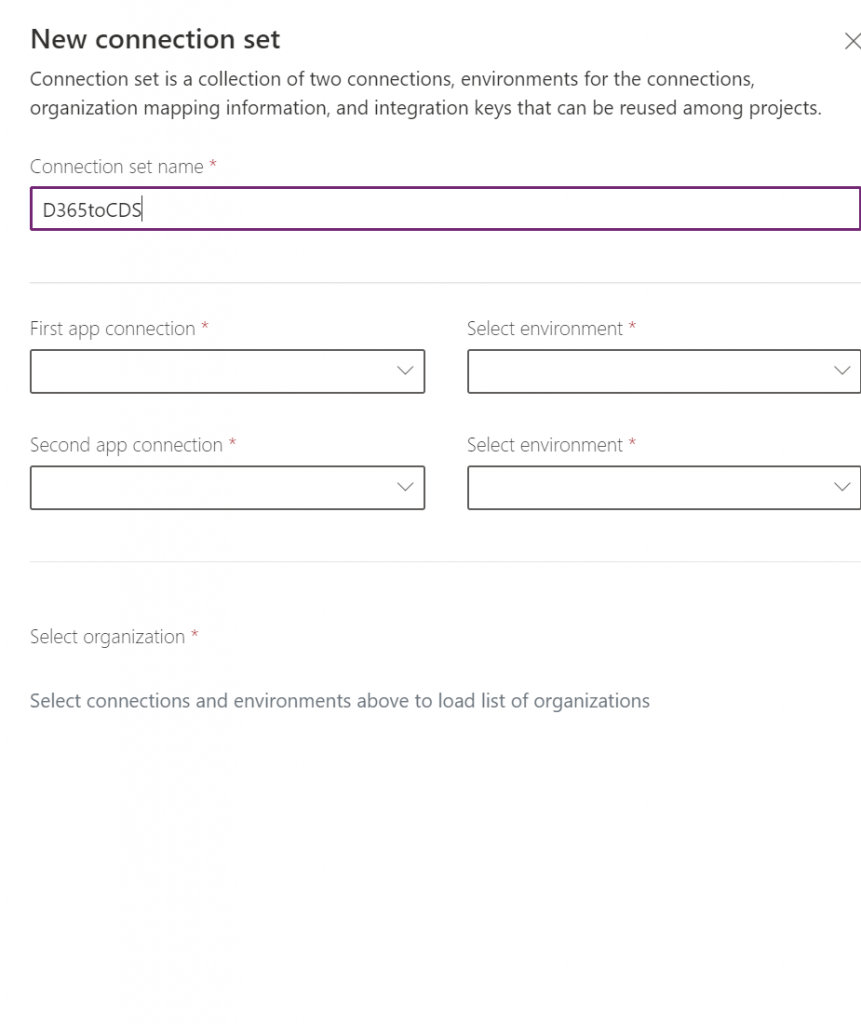
To define the two connecting apps, first select the D365 F&O connector we created earlier and its corresponding environment, then select the CDS connector and its corresponding environment.
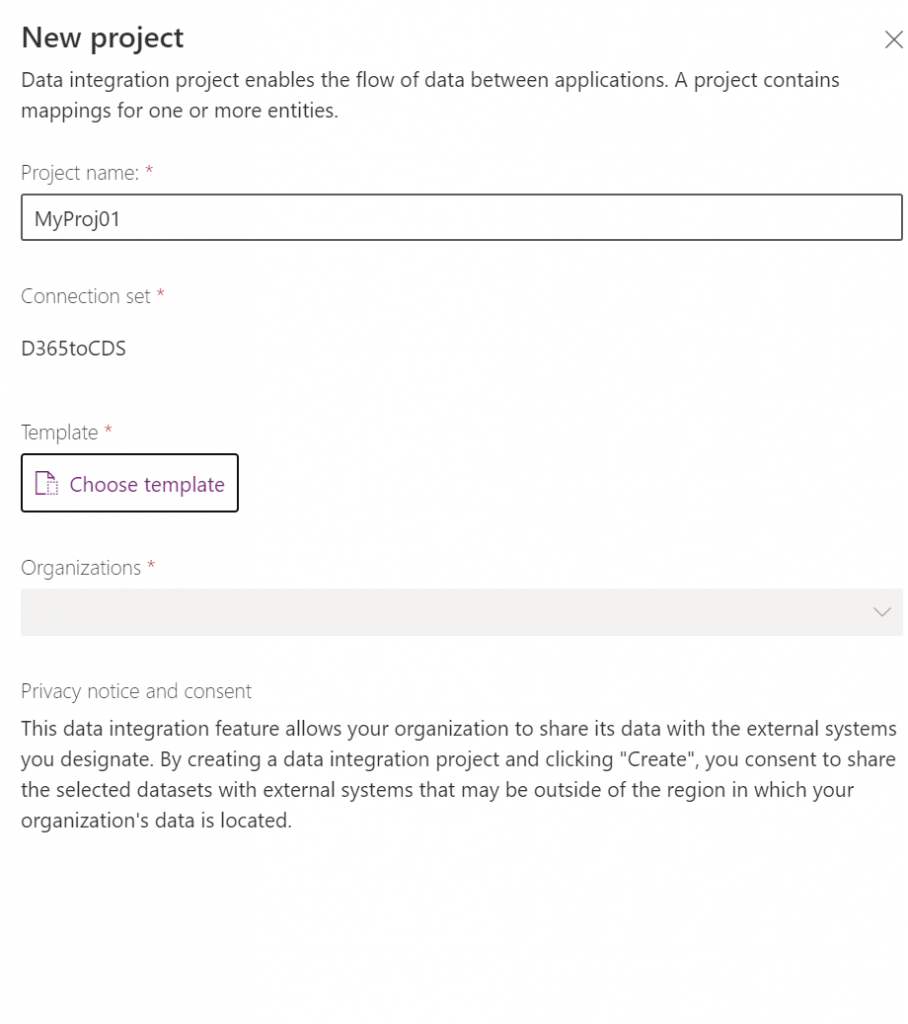
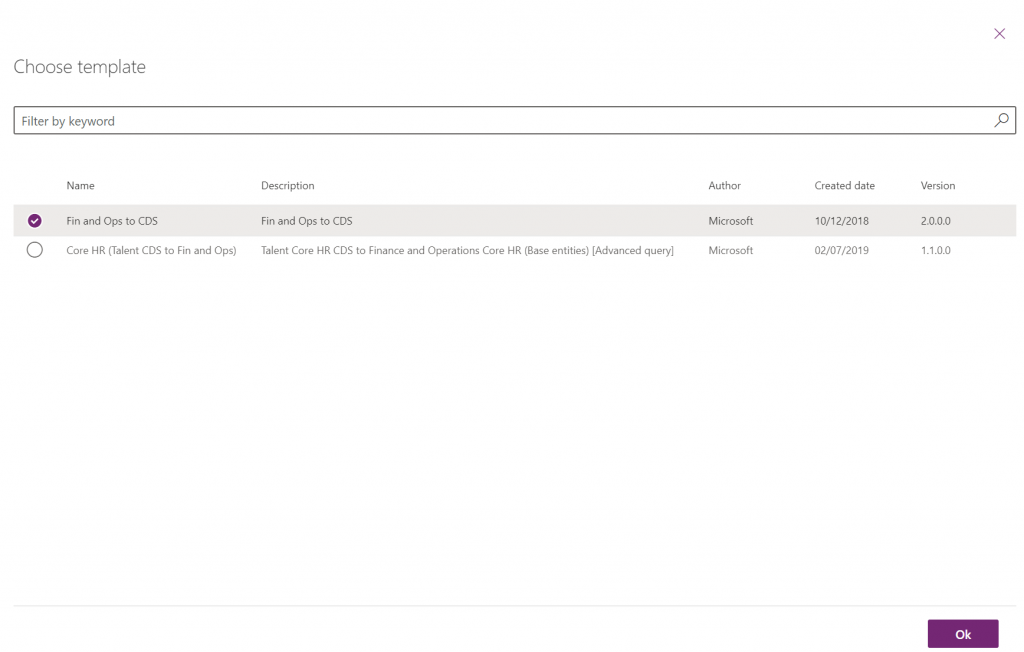
After the connection set is specified, we return to the "New project" dialog where we can select a predefined template. Integration templates serve as a blueprint with predefined entities and field mappings to enable the flow of data from source to destination. They also provide the ability to transform data before importing it.
Creating and Running a Task
After we are done with the new project, we need to create a task.
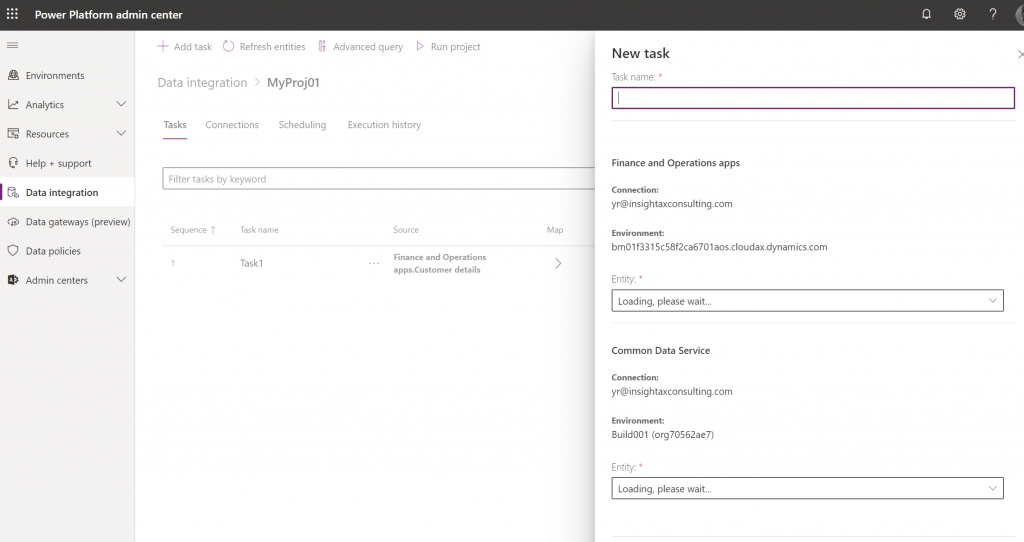
In this dialog, I set the task name and select the corresponding entities within D365 F&O and CDS. It also allows you to select the organisation (legal entity in D365 F&O) that will be used for data transfers.
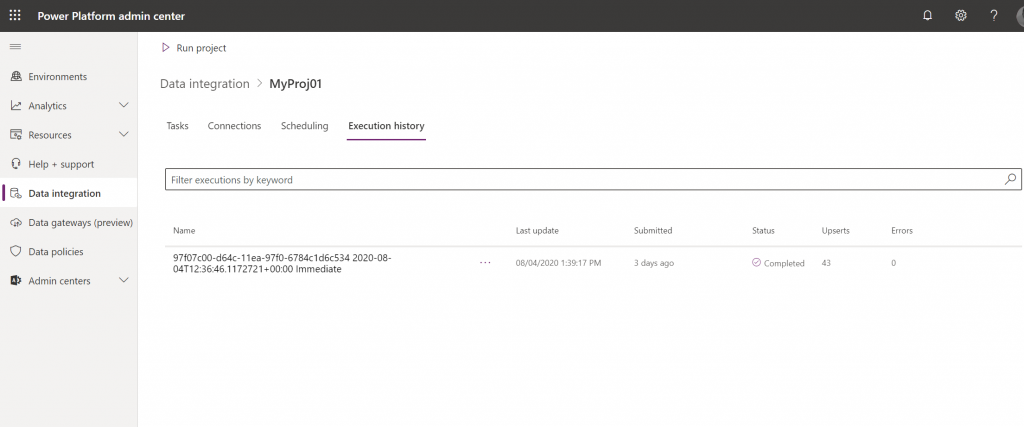
When the task is prepared, we can check the connections, specify additional field mappings, and set a schedule for execution — or simply hit Run project to execute it immediately. The result of each execution is recorded in the Execution history tab.
Verifying the Results
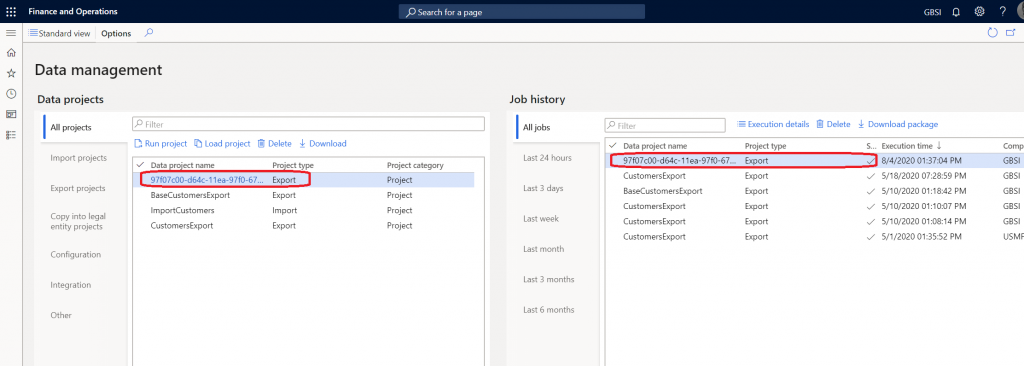
Now let's look at the D365 F&O side. Go to System administration > Data management and we can see that a new export project was automatically created and executed.
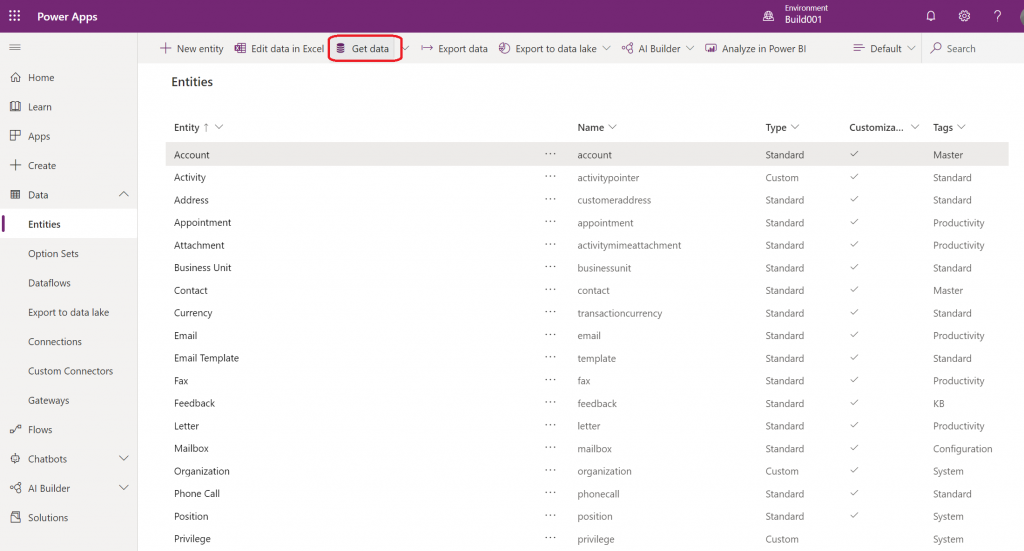
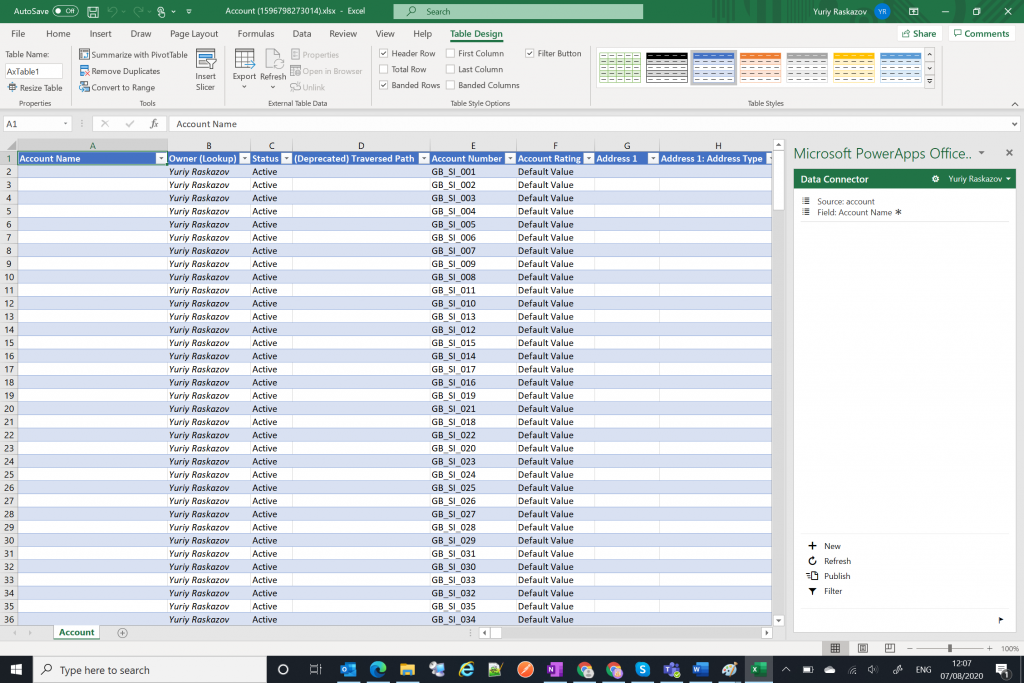
In Power Apps, go to Data > Entities, select the destination entity, and click Edit data in Excel to view the imported data. This is a nice feature and works in the same way as the "Open in Excel" add-in in D365 F&O.
What's Next?
How can all of this be used for your business? The templates feature opens up great possibilities and supports process-based integration scenarios — for example, Prospect to Cash, which provides direct synchronisation between Dynamics 365 F&O and Dynamics 365 Sales. Watch this video from Microsoft to learn more.